Preface
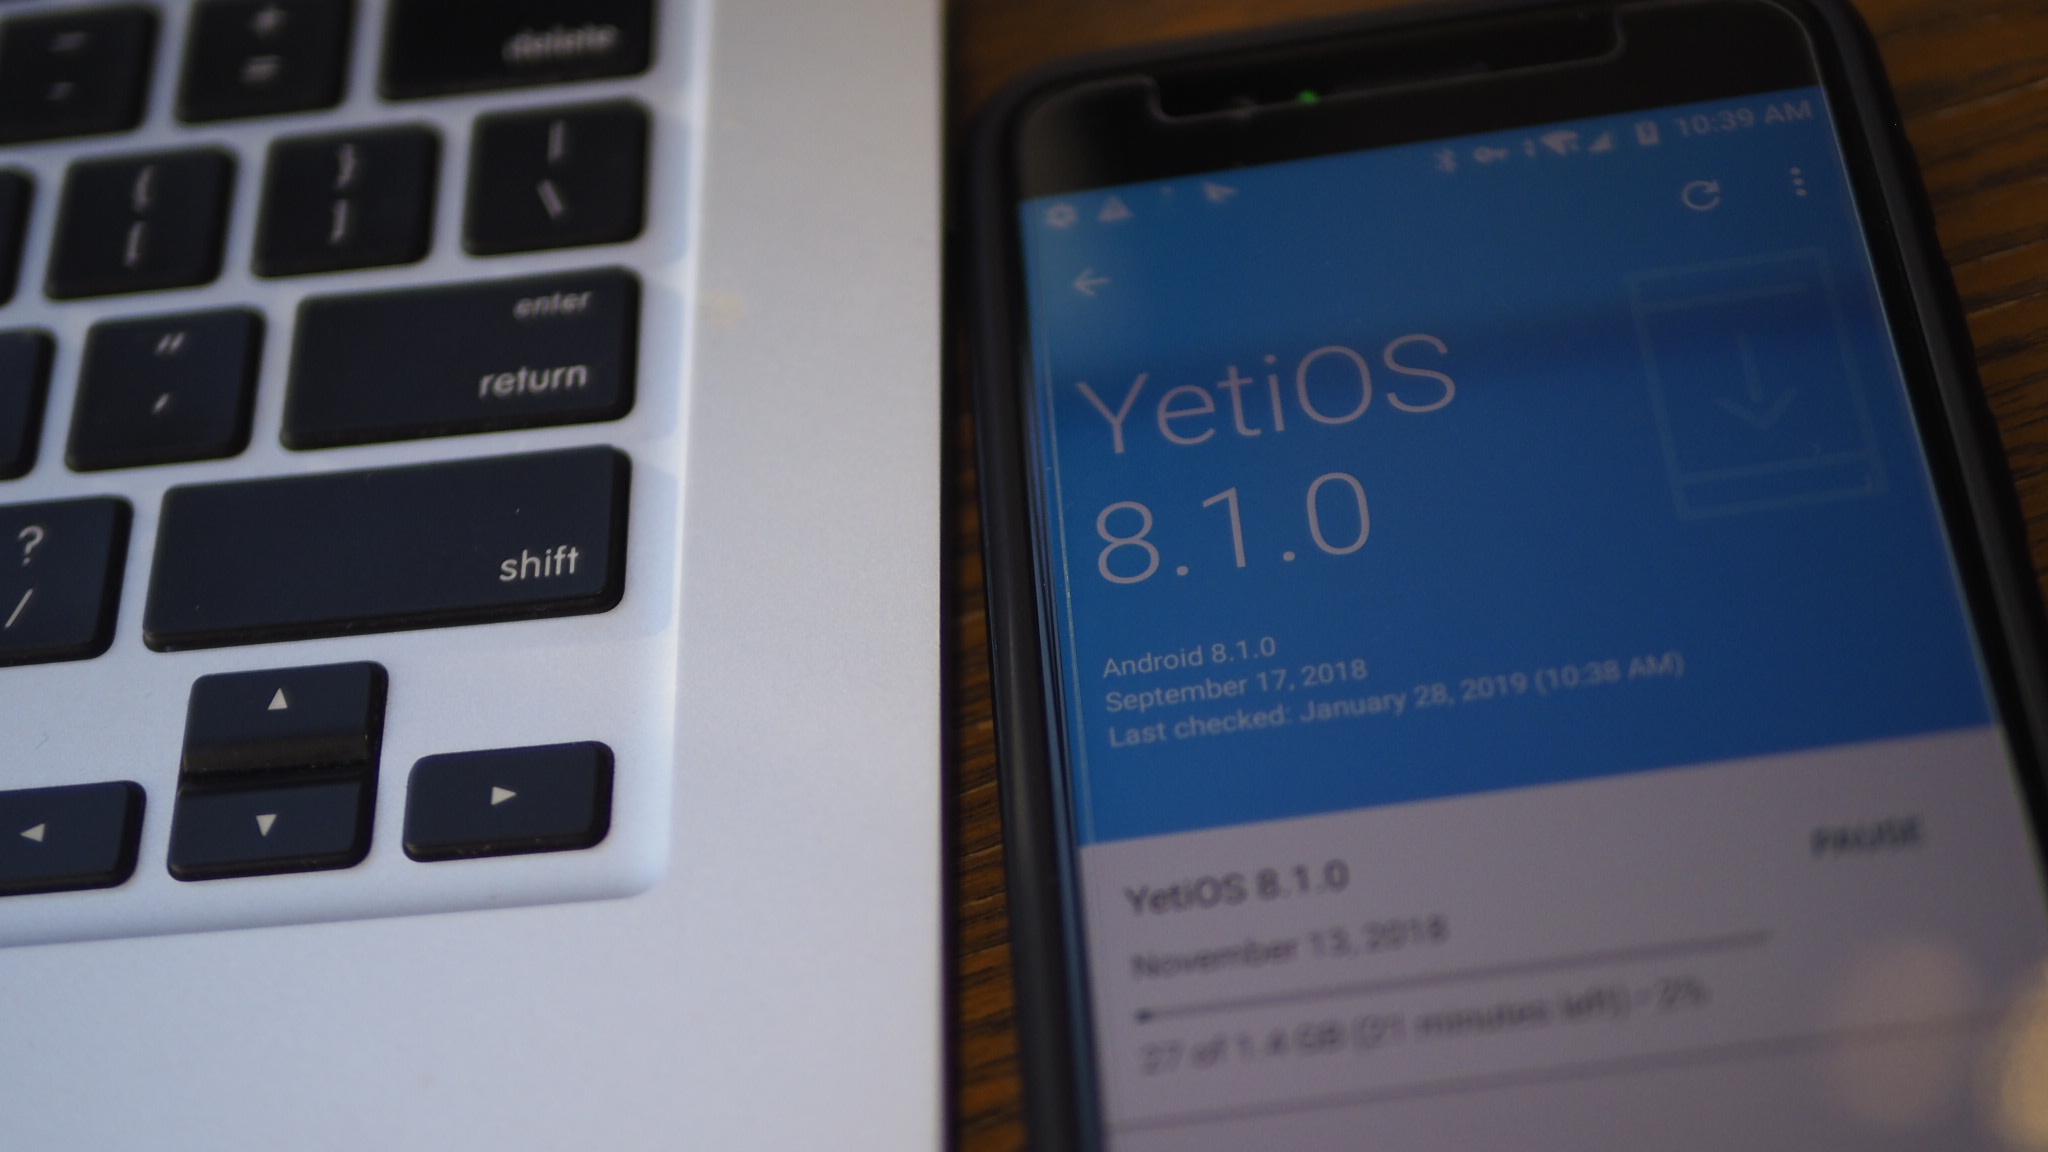
Yesterday night, I upgrated my Yotaphone3 China version (Android 7.1.1, no Google apps) to Yota3+ HongKong version (Android 8.1.0 with all Google apps).
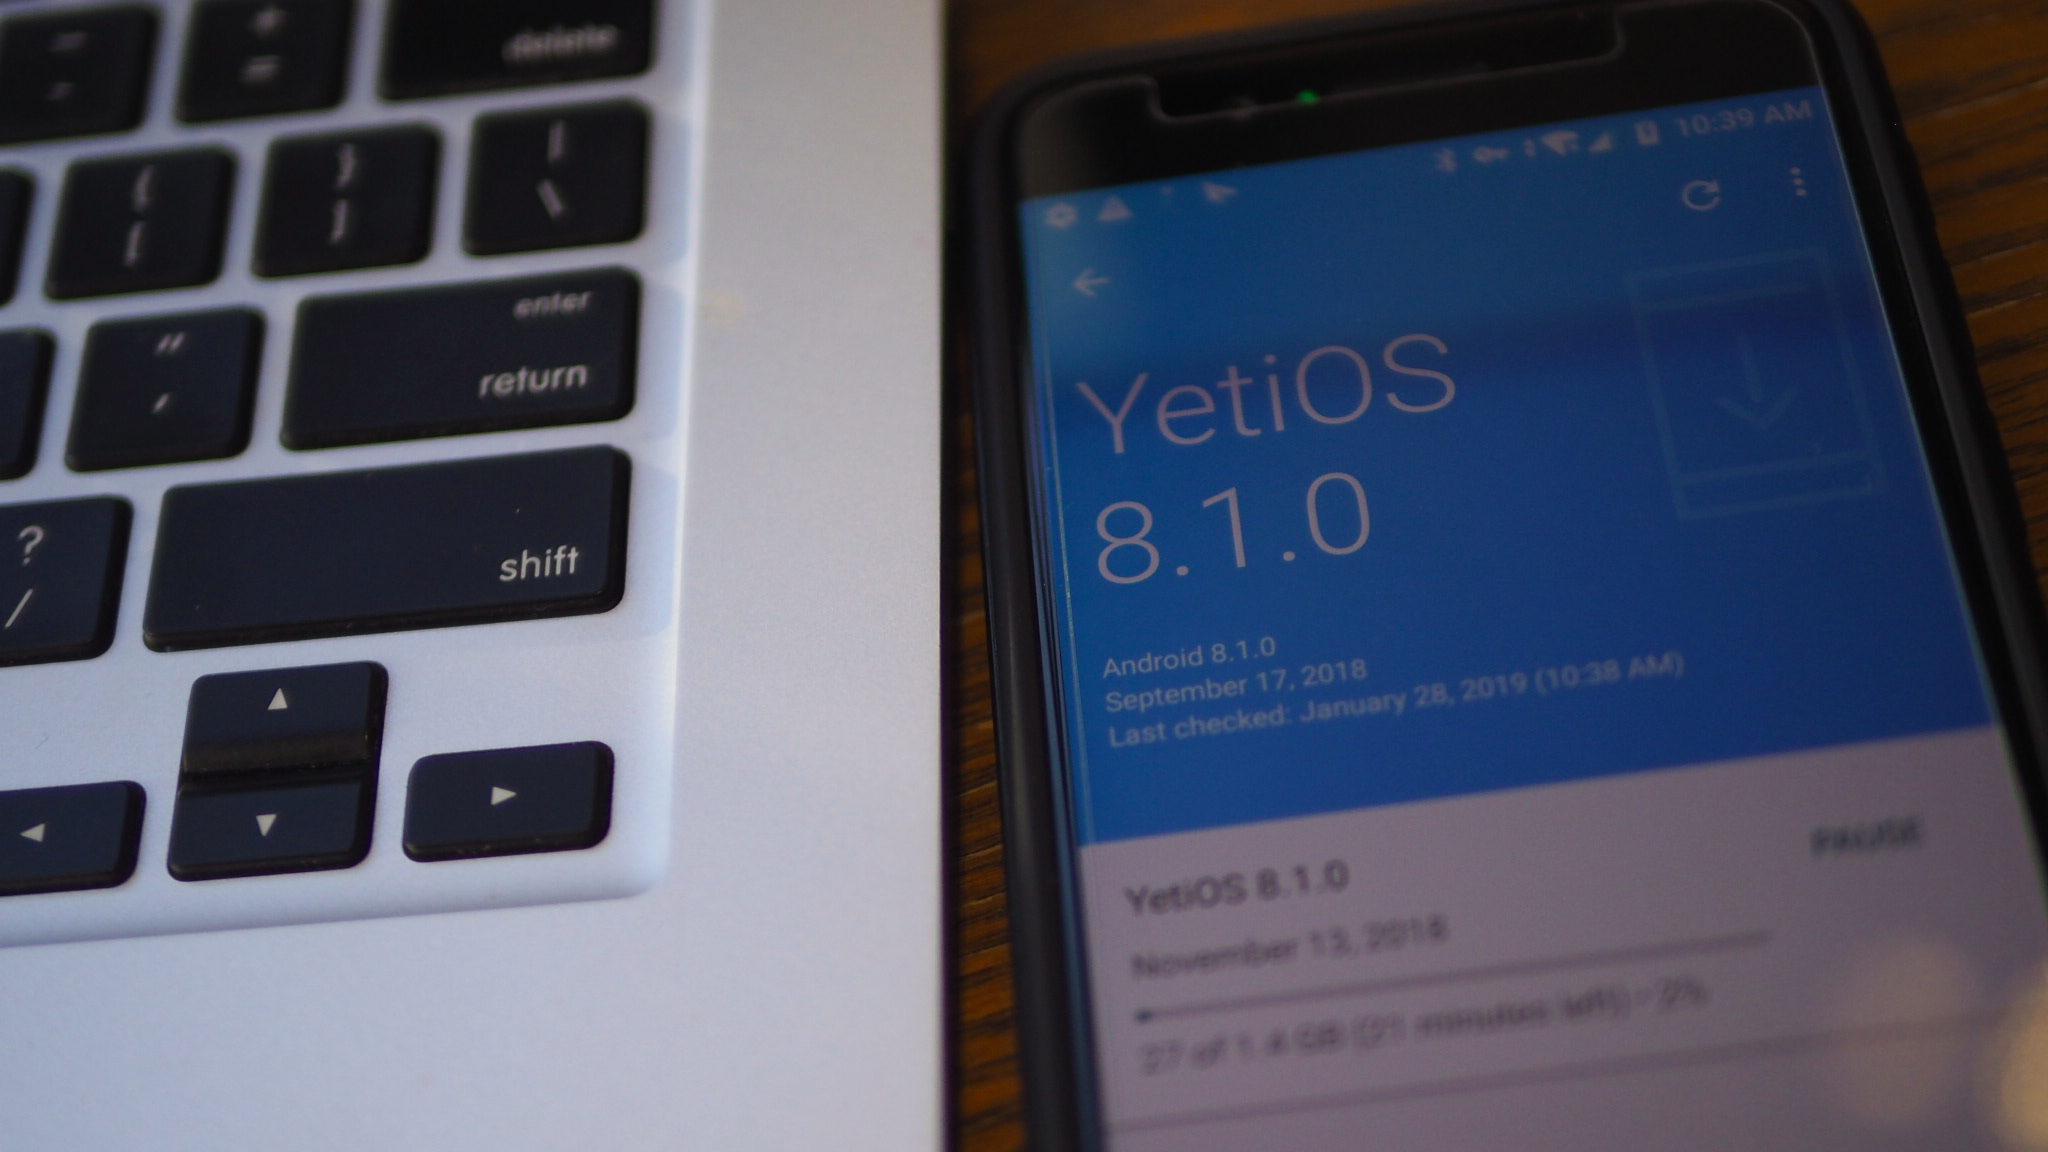
Yota3+ has significant user experience improvement than Yota3 (China version), inherently support all apps in back screen (E-ink screen), running Android 8.1.0 which is safer and crispy.
Caveats
- Everything in your Yota3 will be wiped (lost)
- There is a chance that your Yota3 may be ruined (brick)
All apps you need
- Links Weiyun Yota3 to Yota3+ password:2ahhzj
- Download it and unzip it
Prerequistes:
- Windows 10
- Yotaphone 3 (China edition, Android 7.1.1, 64G/128G)
- ADB / fastboot binaries are put in your system PATH
- Don’t know how? Google it.
- Windows 10 ADB drivers are installed
- For Chinese, try 驱动精灵 drivergenius
- For English speaker, please Google it
- Or try this one (not tested by Paul)
- Download everything I provided upon and unzipped it in your local Drive.
Steps
Install TWRP & ROOT:
You must root your phone to backup QCN.
Enable Developer Mode / USB debugging
- Go to Settings, About Phone -> hit Build Number 7 times to enable Developer mode
- Go to Settings -> Advance settings -> Developer options
- Enable USB debugging
- Enable OEM unlock
fastboot and OEM unlock:
- Power down, disconnect from USB
- Press
Volume Down+Power buttonfor 5s - Open Windows -> CMD and execute
fastboot flashing unlock
fastboot oem unlock
Don’t know how to open CMD? Google it.
(Explorer/File open the unzipped downloaded files folder, enter
cmdin File location/Address bar and press Return/Enter key)
Install TWRP recovery:
- Hold Power to shutdown, wait until the Battery charching symbol disappear if any
- Hold Power and Volume Down for 10s
fastboot flash recovery rec.img
fastboot flash recoverybp rec.img
fastboot boot rec.img
- Use TWRP to restart your phone to System.
- Before restart, make sure you check
Disable Stock Recoveryso that in future, to pressVolume UP+Power buttonwould bring you toTWRP recovery
- Before restart, make sure you check
Factory Reset / Wipe everything:
- Option #1: Android Factory Reset
- Go to Android Settings and perform Factory Reset
- Option #2: Use TWRP to wipe
- User TWRP to wipe Internal Storage and data (Advanced Mode)
- Ignore all failures (mount failures, etc.)
- TWRP Restart to System
Enable Developer Mode / USB debugging
- Go to Settings, About Phone -> hit Build Number 7 times to enable Developer mode
- Go to Settings -> Advance settings -> Developer options
- Enable USB debugging
- Enable OEM unlock
- Connect your Yota3 to Windows 10
- Wait for ADB drivers installed if any
- Open Windows 10 CMD and execute
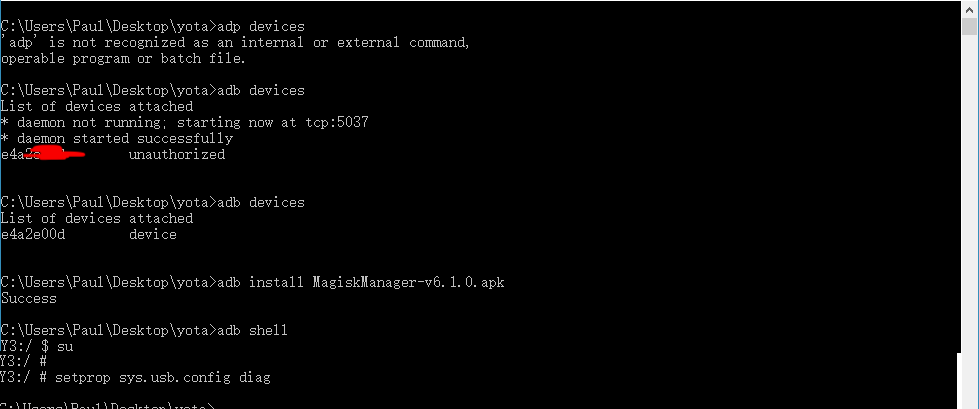
adb devices
- Unlock your Yota3, and authorize/agree the USB debugging request
- Install MagiskManager via ADB install in Windows 10 CMD, execute
adb install MagiskManager-v7.0.0.apk
- Download Magisk zip
- Open MagiskManager app in your Yota3
- Tap Install
- Tap Download Zip only
- TWRP Recover install Magisk
- Power off Yota3, disconnect USB
- Hold
Power button+Volume Upto TWRP Recovery - After TWRP loaded, click
Install, go to the file locationDownload / Magisk ***.zip, pick it and Swipe TWRP to confirm. - Ignore all errors.
- Reboot to System. After Yota3 reboots, go to Magisk Manager app to check if the Magisk is installed
Backup QCN (IMEI)
- You must backup your QCN(IMEI) file in case of loosing it, or your phone may not be able to connect to 4G anymore. As follows.
- Open the downloaded files in your Windows 10
- Install QPST_2.7.474China
- Install QDLoader+HS-USB+Driver_64bit_Setup
- Restart Windows 10 as requested after the driver installed
- Enable Qualcomm Diagnostics
- After Windows 10 restarted, connect the Rooted Yota3 to Windows 10 via USB
- Windows 10 CMD execute,
adb shell
su
- Allow SuperSU
- Go to Yota3 to allow it in SuperSU (installed in Magisk already)
- After allowed SU, Windows CMD execute
setprop sys.usb.config diag
- Wait for Qualcomm USB Diagnostics Drivers installed in your Windows 10
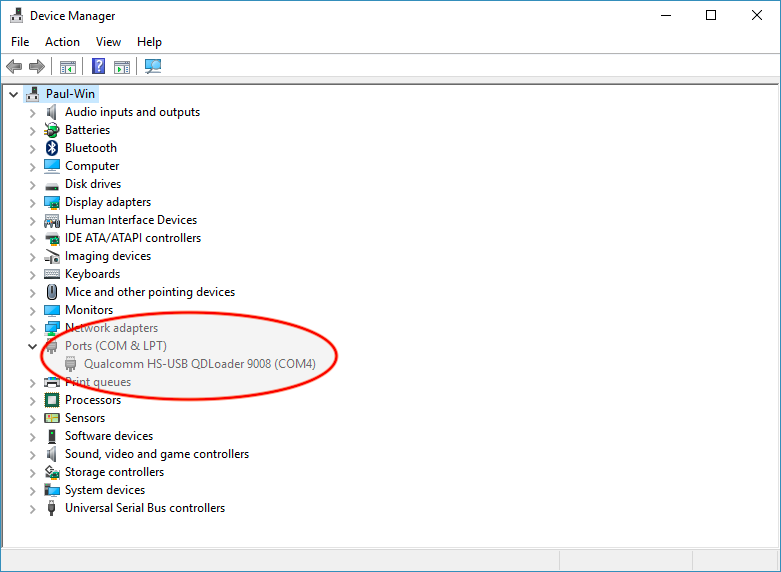
- Right click Windows Start icon, open
Device Manager - Windows Start icon is the Start icon in the left-bottom of your Windows 10 desktop
- Right click Windows Start icon, open
- Check Ports (COM & LPT), make sure
Qualcomm HS-USB Diagnostics 900E(COM*)is shown
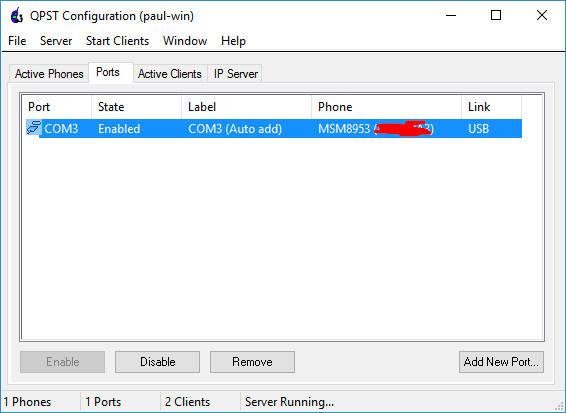
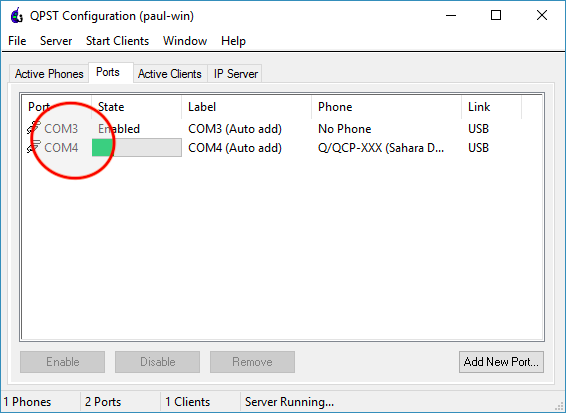
- QPST Configuration
- Go to Windows 10 Start icon -> QPST -> QPST Configuration, You could see a new Port is added, shown as,
Port: COM3, Phone: MSM8953(*****)
- If nothing is shown, that means your Yota3 is not rooted correctly or
setprop sys.usb.config diagfailed or USB connection is unstable- You should abort your upgrade if you can’t backup NV, or you are on your own risk of bricking your Yota3.
- Click Menu -> Start Clients -> Software Download
- Go to Backup tab; Select a location to back QCN, click Start.
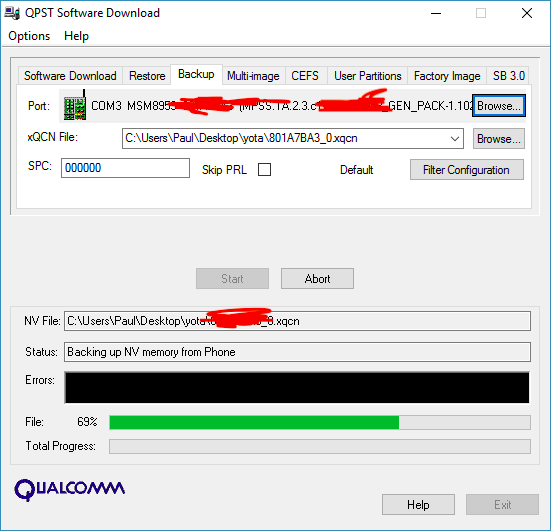
- Wait for File status bar to be 100%. May need a couple of minutes. After finished, exit.
Upgrade to Android 8 Yota3+ HongKong international edition
Finally we are here.
- Toggle off and on USB debugging
- Go to settings -> Advanced Settings -> Developer options, disable it and reenable it, and enable
OEM unlockandUSB debuggingagain
- Go to settings -> Advanced Settings -> Developer options, disable it and reenable it, and enable
- Put the Yota 3 on 9008 mode ( edl mode )
- Option #1 ADB
adb reboot edl
- Option #2 3 buttons
- Power off and disconnect from USB
- Press “Vol +” + “Vol -” + “Power” buttons.
- Connect USB
- Wait for Windows 10 completed Drivers installation.
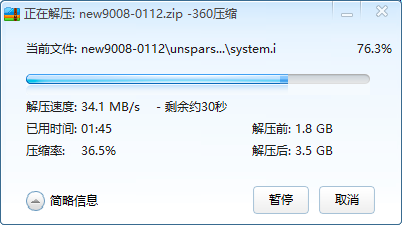
- Download ROM of Yota3+ to your Yota3
- Unzip the downloaded rom new9008-0112.zip
- Close QPST Configuration (QPST server)
- Run Windows 10 Start -> QPST -> QFil.exe, go to Configuration -> Firehose Configuration
- Tick Reset After Download
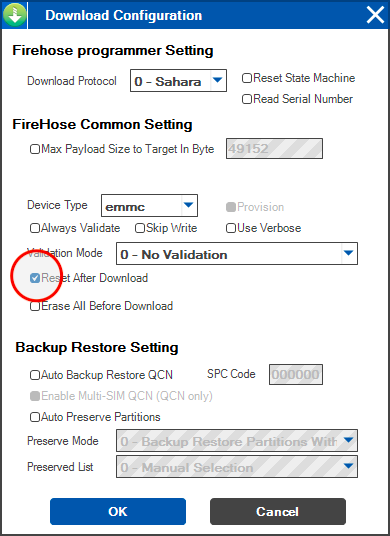
- Select Flat build in Select Build type.
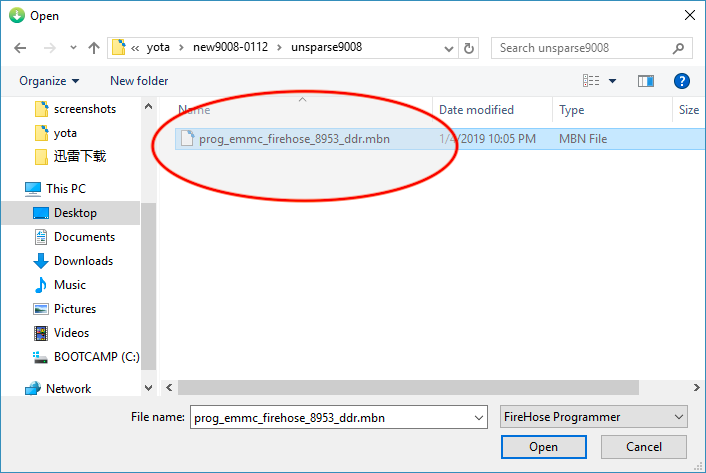
- Click
Browse...button right to Select Programmer
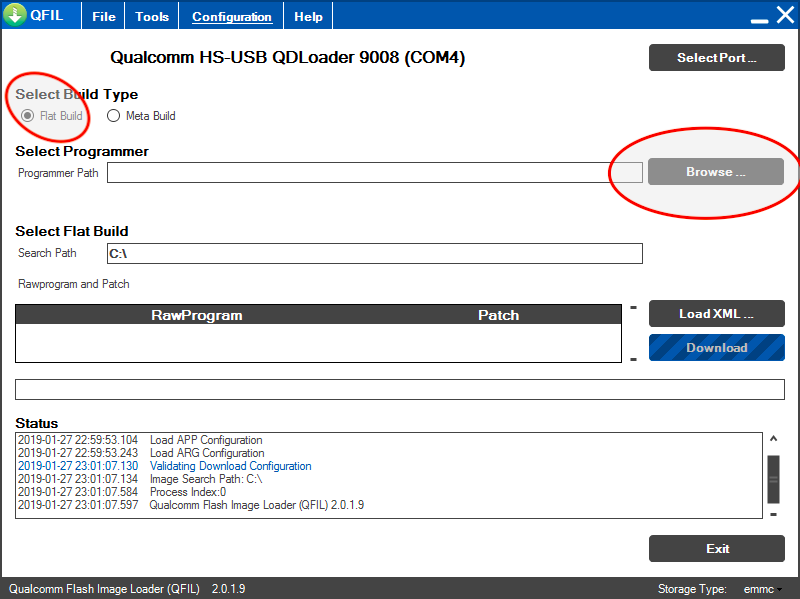
- Select the mbn file from the rom into a the Programmer Path.
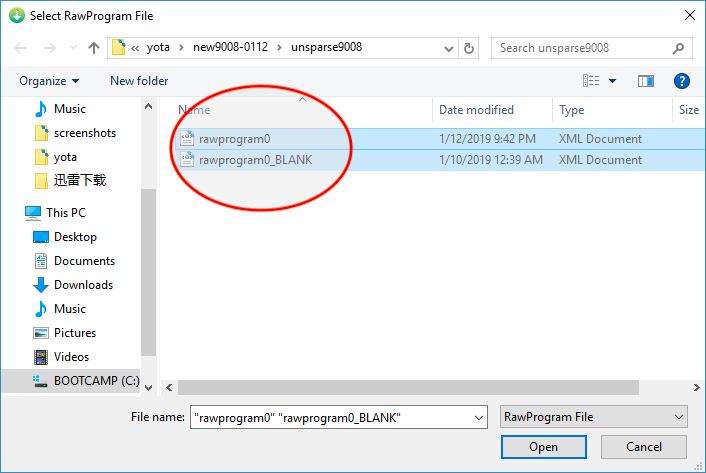
- Click on Load XML… and select the two xml files (
rawprogram0.xmlandrawprogram0_BLANK.xml), and Openpatch0.xmlafter that
- And then click on
Downloadbutton
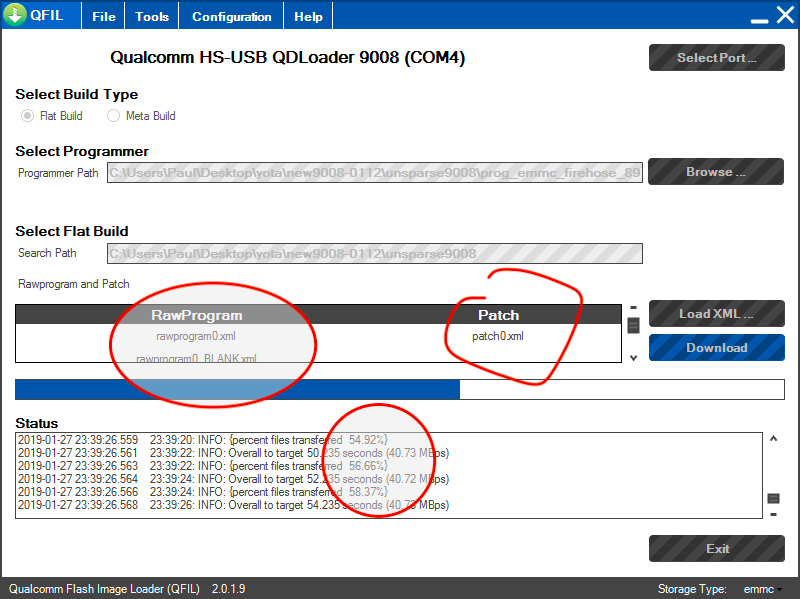
- Wait for 3 minutes
- if it show download failed (USB connection issue), press
Volume Up+Volume Down+Power buttonuntil you hear a Vibration. Reopen QFILE, try the same configuration and Download again
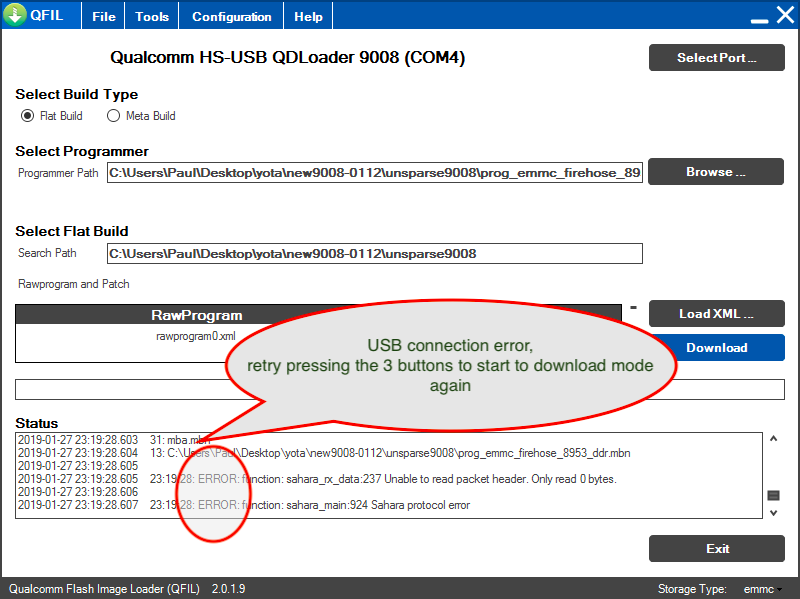
- if it show download failed (USB connection issue), press
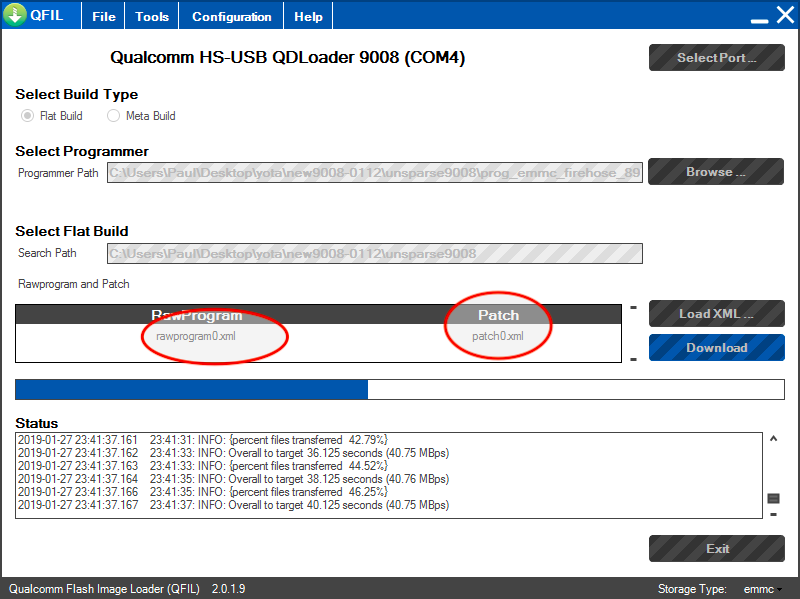
- Wait for 2 minutes until you see Download Success and Download Finished. Next, Then, you need to click on Load XML, and only select the
Rawprogram0.xmland thepatch0.xml. - Click
Downloadbutton again.
- If your phone die / brick during download as Unknown / Unrecognized USB device, follow these steps
- Use your AC adapter to charge it for 2+ hours.
- After 2 hours, make sure you’ve disconnected phone from USB of PC
- Then press
Volume Up+Volume Down+Powerand hold for 20 seconds (you won’t hear any vibration as now it’s hard brick) - Connect phone to USB
- It should show
Qualcomm HS-USB QLoader 9008 (COM*)in Device Manager. If it’s not, try to hold the 3 buttons while USB is connected for 20 seconds - After 9008 mode is enabled, restart from step
Click on Load XML… and select the two xml files
After downloaded, the phone will reboot. and will show a screen “Decryption unsuccessful”. Now you will need to Click Reset the Phone button twice.
Wait for the phone restart for a couple of times. It will go to Encrypting screen.
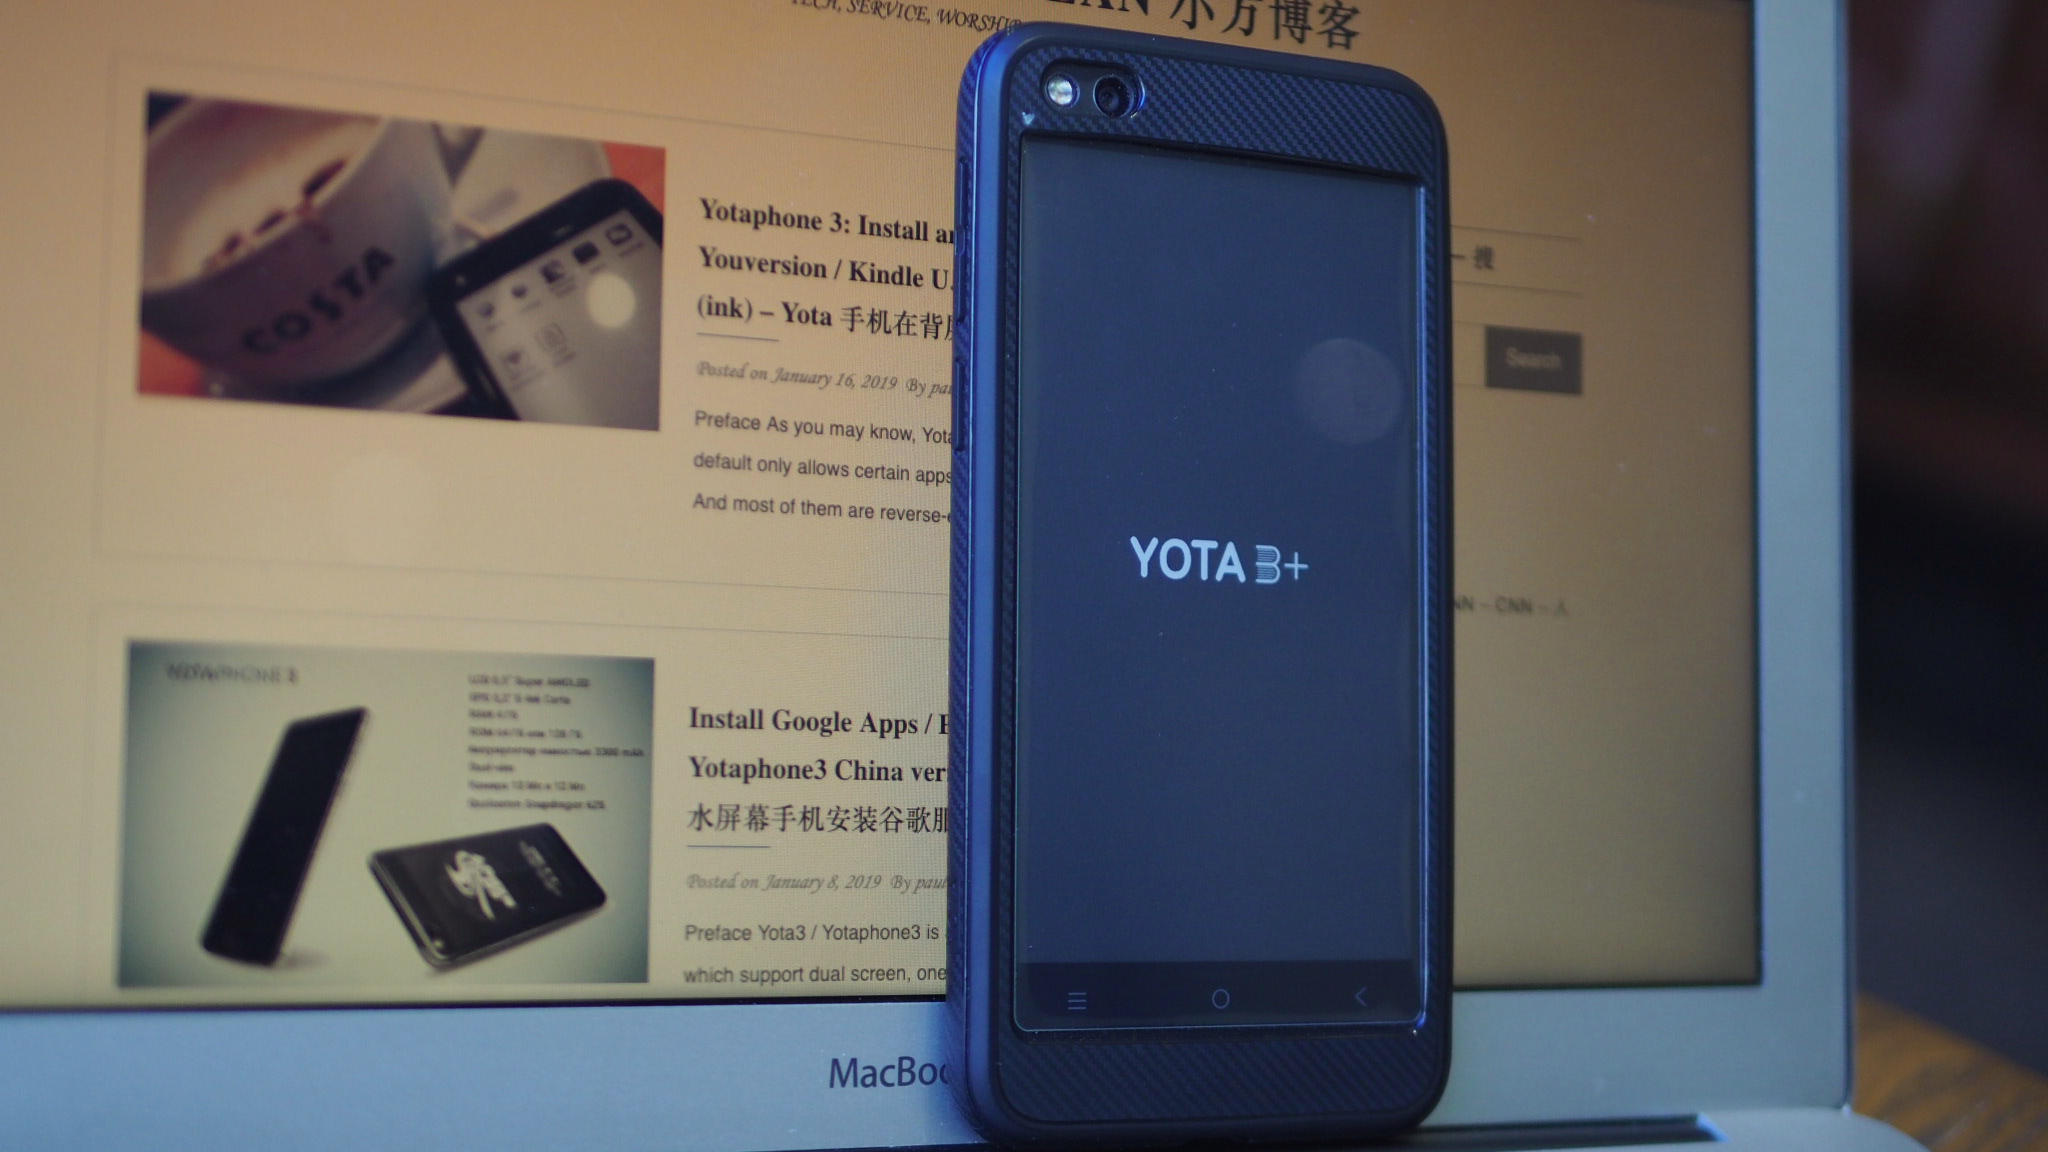
Finally, Your Yota3+ will be booted.
Shots

More
The installed Yota3+ is not rooted and it could receive OTA update.
Wanna root your Yota3+?
TWRP and Raw Yota3 7.1.1 ROM 的提取码方便给我吗?安装你的教程升到港版8.1了 ,感觉还是国内版本好用,想刷回国内版。
TWRP and Raw Yota3 7.1.1 ROM [https://pan.baidu.com/share/init?surl=ezT1OCrOMAzcrYRC5KbmPQ#list/path=%2FY3XSCN06A1000MPX1805077_full&parentPath=%2F]