昨天开始整PhoneGap, 发现最新版PhoneGap有几个致命的Bug,导致无法成功在Windows7 64位下创建环境。解决方法:
I encountered several critical issues on installation my PhoneGap env. Here are the solutions, shared to you:
- 环境准备:
Env Preparation:- 安装最新的JAVA /Eclipse Classic/Android SDK
Install latest JAVA /Eclipse Classic/Android SDK - JAVA_HOME 环境变量需要配好
Configure JAVA_HOME - 使用Android SDK 下载其他的组件,建议下载4.0.3和2.3.*的,还有Extra中的 Android Support Library
Download components via Android SDK, and Android Support Library inside Extra- HTC OpenSense可能会安装不了,可以忽略
Ignore HTC OpenSense if failed
- HTC OpenSense可能会安装不了,可以忽略
- 需要下载Ant
require Ant Env- 下载Zip: http://ant.apache.org/bindownload.cgi
download Zip: http://ant.apache.org/bindownload.cgi
- 下载Zip: http://ant.apache.org/bindownload.cgi
- 需要将相关环境变量 Path修改正确。
Set your Path of Windows 7 Env Variable.- 这是我的Path环境变量配置:D:\Program Files\Java\jdk1.7.0_04\bin;D:\Program Files (x86)\Android\android-sdk\tools;E:\PhoneGap\software\apache-ant-1.8.4-bin\apache-ant-1.8.4\bin;
Here is my Path: D:\Program Files\Java\jdk1.7.0_04\bin;D:\Program Files (x86)\Android\android-sdk\tools;E:\PhoneGap\software\apache-ant-1.8.4-bin\apache-ant-1.8.4\bin;
- 这是我的Path环境变量配置:D:\Program Files\Java\jdk1.7.0_04\bin;D:\Program Files (x86)\Android\android-sdk\tools;E:\PhoneGap\software\apache-ant-1.8.4-bin\apache-ant-1.8.4\bin;
- 在 Eclipse中,安装 ADT
Install ADT inside Eclipse - 下载 PhoneGap
Download PhoneGap:
- 安装最新的JAVA /Eclipse Classic/Android SDK
- 解压并找到 PhoneGap里的create.js,这是我的位置:
unzip and locate create.js of PhoneGap. Here is mine:- E:\phonegap\software\phonegap-phonegap-2.2.0-0-g8a3aa47\phonegap-phonegap-8a3aa47\lib\android\bin
- 修正 PhoneGap 2.2.0里的 Create.js的致命错误
fix critical bug of create.js of PhoneGap 2.2.0 - 使用cmd.exe,找到 create.js路径之后运行之
use cmd.exe to run create.js- 按照 http://docs.phonegap.com/en/2.2.0/guide_getting-started_android_index.md.html#Getting%20Started%20with%20Android 第三步做
create project as step 3 of http://docs.phonegap.com/en/2.2.0/guide_getting-started_android_index.md.html#Getting%20Started%20with%20Android - 确保不要将临时项目产生在Eclipse下面的workspace下,否则下面的Eclipse导入步骤将会严重报错
make sure don’t create your temporary PhoneGap project under workspace of your Eclipse, or this will stop Eclipse from importing the project.
- 按照 http://docs.phonegap.com/en/2.2.0/guide_getting-started_android_index.md.html#Getting%20Started%20with%20Android 第三步做
- 创建安卓模拟器, 4.0.3是推荐的
Create a new Android Virtual Device, 4.0.3 is recommend. - 按照 http://docs.phonegap.com/en/2.2.0/guide_getting-started_android_index.md.html#Getting%20Started%20with%20Android 步骤 4A做,你可能遇到如下问题
Deploy as 4A of http://docs.phonegap.com/en/2.2.0/guide_getting-started_android_index.md.html#Getting%20Started%20with%20Android, you may run into problem as followed:
- android:hardwareAccelerated=”true” 和 android:configChanges=”orientation|keyboardHidden|keyboard|screenSize|locale” 报错,解决方法:
Error reported with android:hardwareAccelerated=”true” and android:configChanges=”orientation|keyboardHidden|keyboard|screenSize|locale”, the solution is here:- http://stackoverflow.com/questions/5158824/enable-hardware-acceleration-in-android-app-targeting-honeycomb-and-prior-versi
- 要么放弃高级属性,要么将项目运行在安卓4.0.3上
deploy to 4.0.3 will solve the issues.
- 要么放弃高级属性,要么将项目运行在安卓4.0.3上
- http://stackoverflow.com/questions/5158824/enable-hardware-acceleration-in-android-app-targeting-honeycomb-and-prior-versi
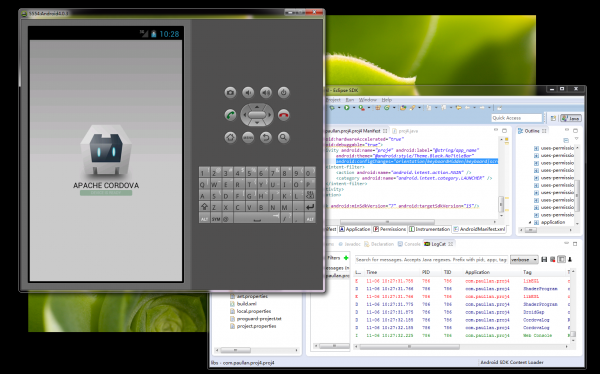
成功了,有图有真相:
I’m finished. Here is my screenshot

1 thought on “Window7 64位下PhoneGap 2.2.0 环境配置教程–PhoneGap Installation Tutorial”
Comments are closed.